The first time someone showed me Trello, I thought it was just a fancy to-do list with coloured cards.
I smiled, nodded, and went back to my chaotic mix of sticky notes and half-finished Google Docs. Classic mistake.
Three weeks later I was drowning in a freelance project with four clients, twelve deliverables, and absolutely no idea what was due when. A friend sat me down, opened Trello on her laptop, and built me a basic board in about eight minutes.
I’ve used it almost every day since.
If you’ve heard of Trello but never quite figured out where to start — or you’ve opened it once, felt confused, and closed it again — this guide is written for you. This guide on how to use Trello for beginners walks you through everything from your first board to daily habits that actually stick. No jargon. No unnecessary complexity. Just the stuff that actually matters.
What Is Trello and Why Should You Bother?
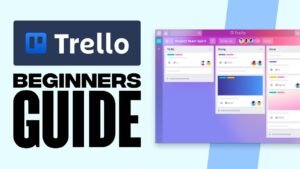
Trello is a free project management tool that organises your tasks using boards, lists, and cards. The whole thing is visual — you drag and drop tasks across columns to show their progress.
It’s based on a method called Kanban, which sounds fancy but is basically just: things you need to do, things you’re doing, things you’ve done. That’s it.
Knowing how to use Trello for beginners starts with understanding these three simple building blocks — boards, lists, and cards. Once you get those, everything else clicks naturally.
What makes Trello genuinely useful — especially compared to a plain to-do list — is that it shows you the full picture at a glance. You can see everything that’s in progress, everything that’s waiting, and everything that’s done without clicking through ten different screens.
It works for solo use, for students, for small teams, for freelancers, for pretty much anyone managing more than five tasks at a time. And the free plan is legitimately good — you don’t need to pay for anything to get real value from it.
How to Use Trello for Beginners: Setting Up for the First Time
Step 1 — Create Your Free Account
Go to trello.com and sign up with your email or Google account. The free plan gives you unlimited cards, up to 10 boards per workspace, and all the core features you need as a beginner.
Takes about two minutes. No credit card required.
Step 2 — Create Your First Board
A board is your workspace for a specific project or area of your life. Think of it like a physical whiteboard on a wall.
Click the “Create new board” button → give it a name → pick a background colour → click Create.
Some ideas for your first board:
- “University Assignments”
- “Work Projects”
- “Content Calendar”
- “Home Tasks”
- “Job Search”
Start with just one board. Seriously. Beginners always make the mistake of creating five boards at once and then maintaining none of them.
Step 3 — Create Your Lists
Lists are the columns inside your board. Each list represents a stage or category.
The simplest setup for any beginner — and the one I still use for most projects — is three lists:
- To Do — everything you haven’t started yet
- In Progress — what you’re actively working on right now
- Done — completed tasks (satisfying to fill this one up)
Click “Add a list” on your board → type the name → press Enter. Repeat for each column.
You can always add more lists later. But three columns is enough to start getting real value from Trello immediately.
Step 4 — Add Your First Cards
Cards are your individual tasks. Each card lives inside a list.
Click “Add a card” at the bottom of any list → type your task name → press Enter.
Don’t overthink what to put on a card. If it’s a task you need to do, it gets a card. Simple.
Some examples:
- “Write essay introduction”
- “Email client about invoice”
- “Buy birthday present for Mum”
- “Revise Chapter 4 notes”
Step 5 — Open a Card and Add Details
This is where Trello gets genuinely powerful.
Click on any card to open it. Inside you’ll find:
Due date — set a deadline. Trello will turn the card red when it’s overdue, which is a surprisingly effective motivator.
Description — add notes, instructions, or context. I use this for assignment briefs, client feedback, or anything I need to remember about the task.
Checklist — break the task into smaller steps. A card called “Write blog post” might have a checklist: research → outline → draft → edit → add images → publish.
Labels — colour-coded tags. I use these to mark urgency: red for urgent, yellow for this week, green for whenever.
Attachments — add files, Google Drive links, or images directly to the card.
Comments — leave notes for yourself or your team. Really useful when working with others.
You don’t need to fill in everything on every card. Even just adding a due date and a checklist makes a card ten times more useful than a plain sticky note.
How to Use Trello for Beginners: Day-to-Day Routine
Setting up the board is the easy part. Using it consistently is where most people fall off.
Here’s the routine that works for me:
Every morning: Open Trello, look at your “In Progress” list. What needs to happen today? If a card’s due date is today or tomorrow, that’s your priority.
During the day: As you complete steps on a task, tick them off the checklist inside the card. When the whole task is done, drag the card across to “Done.”
Once a week: Look at your “To Do” list. Anything that’s been sitting there for two weeks without moving? Either set a due date and commit to it, or delete it. No judgement — some tasks just stop being relevant.
That’s genuinely the whole routine. The power of Trello isn’t the tool itself — it’s the habit of checking and updating it regularly.
Real Examples of How to Use Trello
For Students
Board name: “Semester 2”
Lists: To Do · In Progress · Submitted · Graded
Each card = one assignment. Inside each card: the brief, the due date, a checklist of steps (research, outline, draft, proofread, submit), and any lecturer feedback in the comments after it’s marked.
You can see at a glance exactly where every piece of work stands. No more “wait, when is that essay due?” panic.
For Freelancers
Board name: “Client Projects”
Lists: Backlog · In Progress · Waiting for Feedback · Done
Each card = one deliverable for a client. Use labels to colour-code by client. Add the brief in the description, the deadline as the due date, and paste client feedback in the comments when it comes in.
This setup saved my freelance life. Everything in one place, nothing lost in email threads.
For Personal Tasks
Board name: “Life Admin”
Lists: This Week · Someday · Done
Cards for things like: book dentist appointment, renew car insurance, sort out that pension thing. The “Someday” list is for things that need to happen but not urgently — it stops them cluttering your “This Week” list while making sure they don’t disappear entirely.
Trello Features Worth Knowing About (Even as a Beginner)
Calendar View — see all your cards with due dates laid out in a calendar. Brilliant for spotting when you’ve accidentally scheduled five deadlines in one week. Enable it under “Power-Ups” — it’s free.
Templates — Trello has a built-in template gallery with ready-made boards for common use cases: content calendars, job searches, weekly planners, and more. When creating a new board, click “Start with a template” instead of building from scratch.
Mobile App — the Trello iOS and Android apps are excellent. I add cards from my phone all the time when something comes to mind. Takes three seconds. Download it from the App Store or Google Play.
Board Backgrounds and Card Covers — sounds superficial but making your board look good genuinely makes you more likely to open and use it. A board you enjoy looking at is a board you’ll actually maintain.
Mistakes Beginners Make With Trello
The biggest trap when learning how to use Trello for beginners is overcomplicating everything from day one. Here are the most common mistakes and how to avoid them.
Making it too complicated too fast. The moment people discover labels, Power-Ups, and automations they go overboard. Build the simple three-list system first. Get comfortable with it. Add complexity only when the simple version is genuinely holding you back.
Creating cards that are too big. “Complete dissertation” is not a card. Break it into smaller cards — one per chapter, one per section. Tasks you can actually finish in a day or two are the right size for a Trello card.
Never looking at it. Trello only works if you check it regularly. If you set it up and then open it once a week, it becomes outdated fast. Try keeping the tab open in your browser as a constant visual reminder.
Hoarding the “Done” list. Archive completed cards periodically. A Done list with 200 cards is satisfying in theory but cluttered in practice. Select all → Archive all → clean slate.
Using too many boards at once. One board per active project is enough. You don’t need a board for every single area of your life on day one. I started with one board. Two years later I have four. That’s it.
Trello vs a Plain To-Do List — Is It Worth It?
Honestly, if you have fewer than ten tasks on the go at once, a simple to-do list is fine. Trello’s value multiplies with complexity.
But for students managing multiple subjects, freelancers with multiple clients, or anyone running a project with multiple stages, Trello is genuinely better than a list. The visual layout shows you things a list can’t — bottlenecks, overloaded weeks, tasks that have been stuck “In Progress” for suspiciously long.
The free plan covers everything in this guide and then some. You’d only need to upgrade if you were running a large team needing advanced features like unlimited Power-Ups or admin controls.
For a beginner? Free is more than enough.
Getting Started Today
If you want to know how to use Trello for beginners the right way, here’s your five-minute challenge: right now, open trello.com, create a free account, and build one board with three lists — To Do, In Progress, and Done. Add five real tasks you need to do this week. Set due dates on at least two of them.
That’s it. You’re using Trello.
The rest — labels, checklists, Power-Ups, calendar views
— you’ll discover naturally. That’s the real secret of
how to use Trello for beginners: just start with something
real and learn as you go. Don’t try to learn everything before you start. The best way to truly understand how to use Trello for beginners is to use it for something real that actually matters to you.
Your future self — the one who actually knows where everything is — will thank you for it.
Frequently Asked Questions
Is Trello completely free? Yes. Trello’s free plan includes unlimited cards, up to 10 boards per workspace, unlimited members, and all the core features most users need. Paid plans exist for larger teams needing advanced features, but the free plan is genuinely excellent for individuals and small teams.
Is Trello good for students? Absolutely. Once you know how to use Trello for beginners, it becomes one of the best free tools for managing assignments, group projects, and deadlines. It gives you a visual overview of everything at once, which a standard to-do list simply can’t match.
Can I use Trello on my phone? Yes. Trello has free apps for both iOS and Android. All your boards sync instantly across devices so you can add a card on your phone and see it immediately on your laptop.
What is the difference between Trello and Notion? Trello is task and project focused — it’s best for tracking what needs to be done and the progress of each task. Notion is a more flexible workspace that handles notes, databases, documents, and tasks all in one place. Many people use both: Trello for active project management and Notion for notes and reference material.
How many boards should a beginner create? Start with one. Seriously. One board, three lists, real tasks. Get comfortable with the habit of checking it daily before expanding. Most people who quit Trello do so because they created too many boards too quickly and couldn’t keep up with maintaining them all.
Want to go deeper? Check out our guides on Notion vs Trello: Which Is Better for You? and Best Free Productivity Tools for Students in 2026 on Toollan.